How to Make Soft Guyanese Roti (Oil Roti Paratha) – Easy Step-by-Step Guide
Like this recipe? Share it with friends!
Table of Contents
- A Brief History of Guyanese Roti
- Tiffany’s Top Tips for Soft, Flaky Roti
- Substitution Tip: Oil vs Butter
- Serving & Pairing Suggestions for Guyanese Roti
- Tawa Alternatives for Cooking Roti
- Storage and Reheating
- Prefer to watch instead of reading this delicious recipe? check out this video for a quick and easy guide:
- Description
- Ingredients
- Instructions
Learn how to make soft, flaky Guyanese oil roti with this easy step-by-step recipe. Perfect for pairing with curry, stews, or your favorite Caribbean dishes.
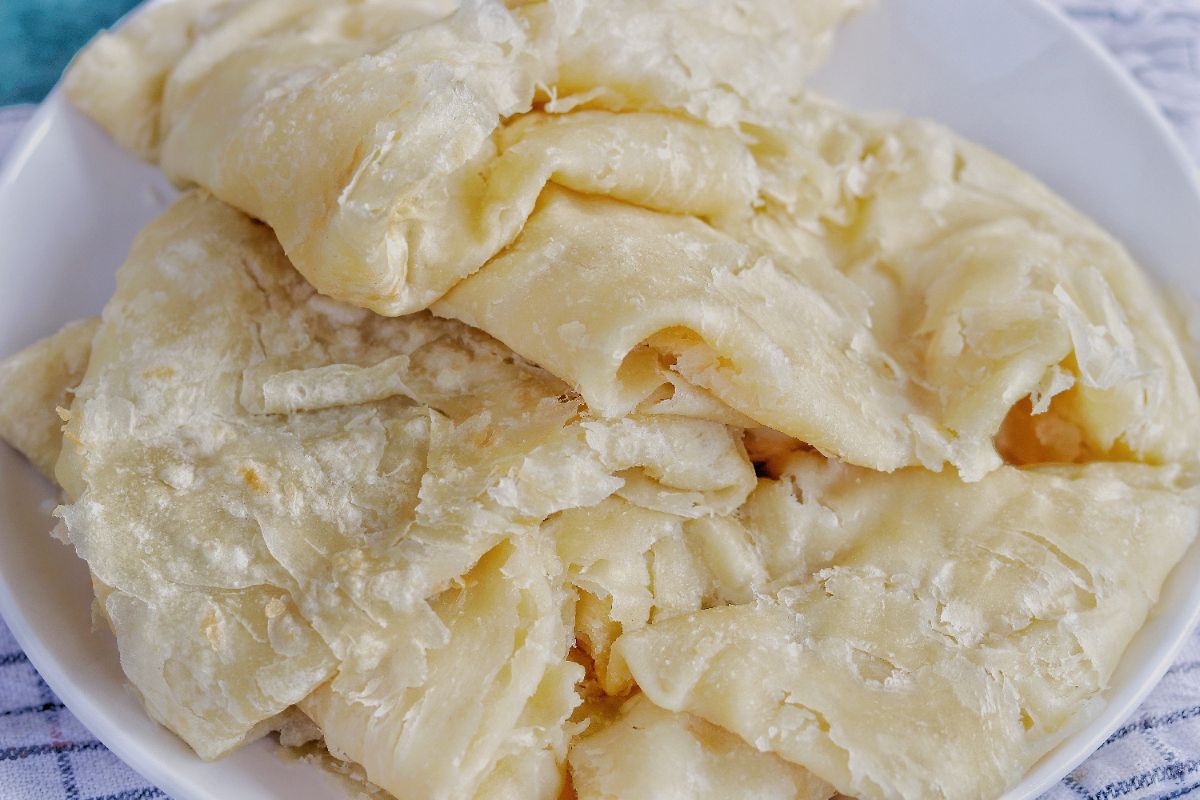
Guyanese roti, also known as oil roti or paratha roti, is a soft, flaky Caribbean flatbread made by layering dough with oil, then cooking it until tender and buttery. Popular in Guyanese and Indo-Caribbean cuisine, this roti is known for its delicate layers and pillowy texture. It’s traditionally served with curries, stews, or enjoyed warm on its own as a staple of Caribbean home cooking.
When I immigrated from Guyana at age 13, I brought with me my deep-rooted Guyanese culture and a strong love for traditional Guyanese food . My mom, who worked for Banks DIH, one of Guyana’s most well-known companies, managed several restaurant kitchens for many years. As a young girl, I had the incredible opportunity to watch professional chefs prepare authentic Guyanese roti right before my eyes. Looking back, after mastering fried bakes, the next dish my mom taught me was roti, and it has since become a cherished recipe in my home.
With just a little practice, I was able to replicate her recipe. However, I must admit that I still can’t clap a roti the way she does! My mom’s technique is effortless, and her rotis are always soft, flaky, and full of so much love. Roti is a staple in our home; we enjoy it with just about everything, from Guyanese chicken curry and fish stew to even canned corned beef. In my opinion, roti pairs well with just about anything such as fried eggs or sardines . There’s truly nothing like the taste of warm, homemade Guyanese roti.
Some of my best memories are of my grandmother in the kitchen with her six daughters. Half of them would be rolling out roti while the others were cutting up seasoning for the curry. Today, whenever I make roti, those moments come rushing back and I’m so grateful to hold on to a piece of home no matter where I live.
If you love these recipes, be sure to check out more traditional Guyanese favorites on the blog like my Guyanese Chicken Curry (Curry Chicken) , Caribbean Fried Bakes & Saltfish , and Grandma Irma’s Guyanese Black Cake Recipe .
.jpg?alt=media&token=09075338-718c-4ed8-9829-6f1717e0ac1f)
A Brief History of Guyanese Roti
Roti came to Guyana through East Indian indentured laborers in the 1800s, during British colonial rule. Over time, this flatbread became a staple of Guyanese and Caribbean cuisine , evolving into several variations from paratha-style oil roti (soft and flaky) to dhal puri (stuffed with split peas) and sada roti (a simpler, puffed version).
Today, Guyanese roti is cherished not just as a side dish but as a symbol of family tradition and cultural identity. It’s often enjoyed with flavorful dishes like chicken curry, pu;mpkin, stews, and more . The most popular version is oil roti or “paratha” roti, which is known for its soft, layered texture, achieved by brushing dough with oil or butter and folding it before cooking.
Tiffany’s Top Tips for Soft, Flaky Roti
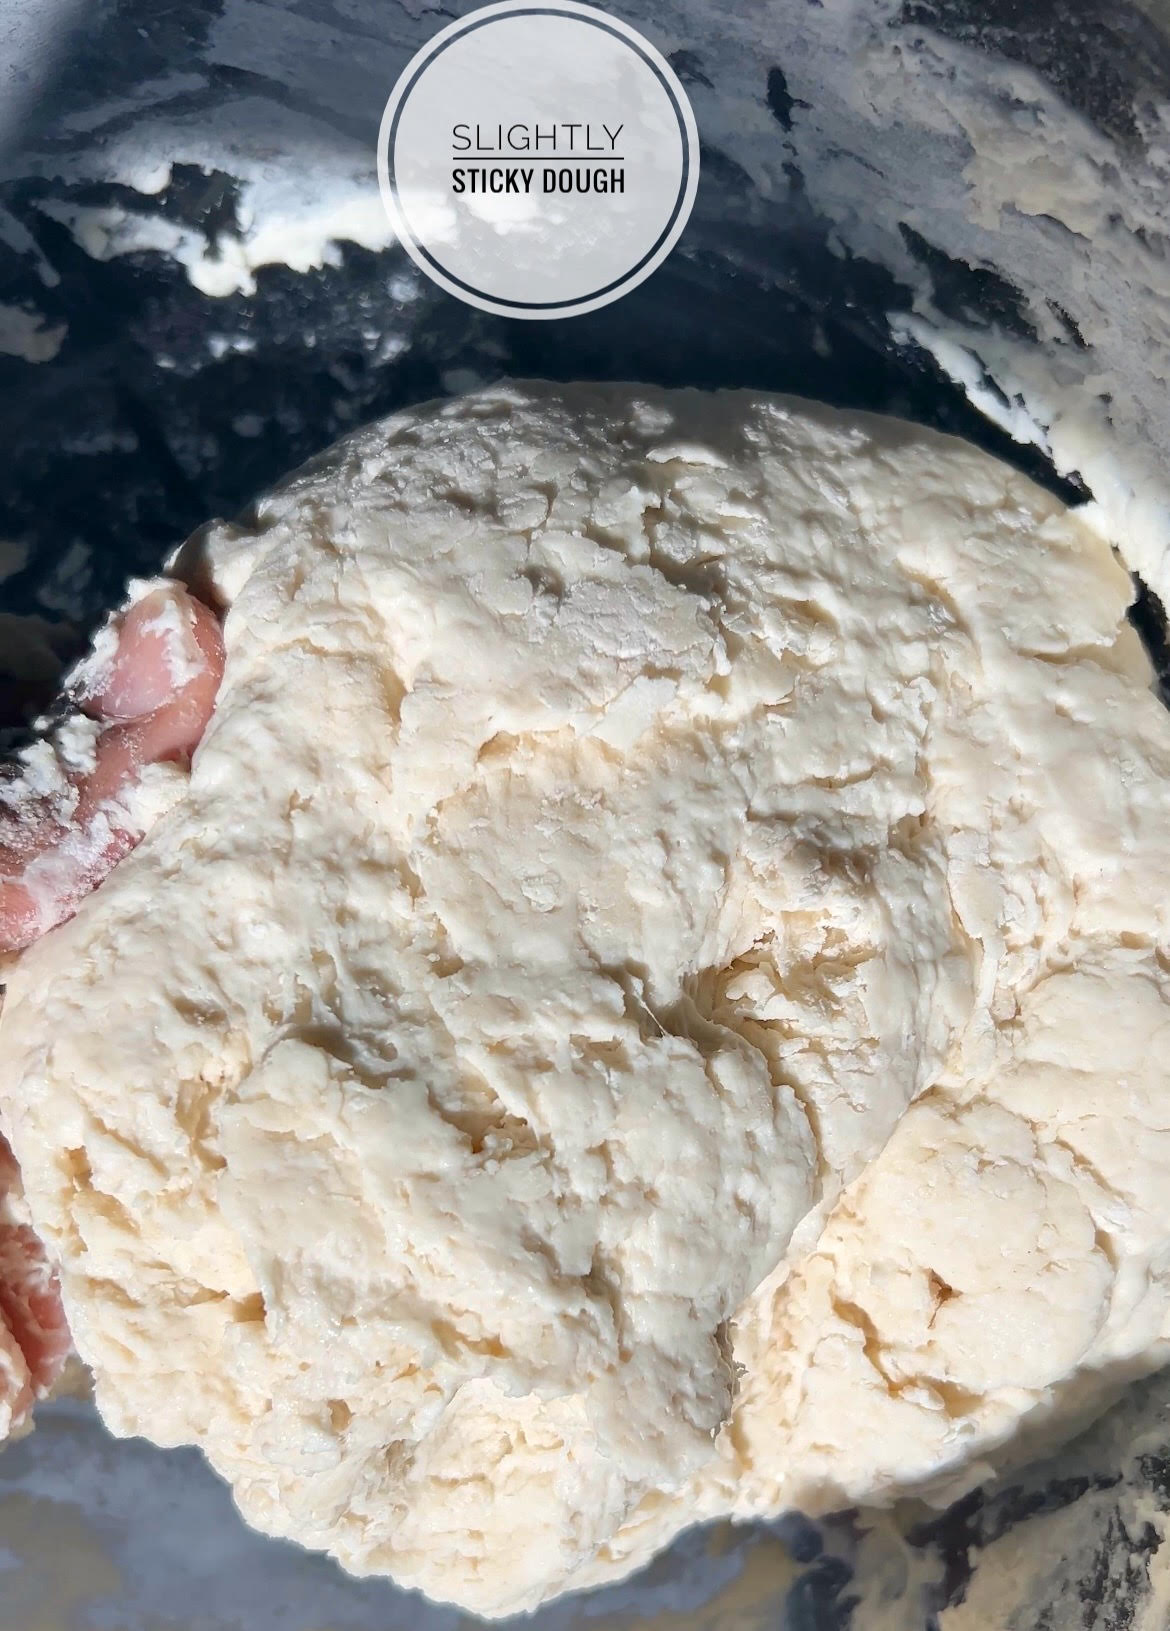
Use warm water: Adding warm (not hot) water helps the dough come together smoothly and stay soft. Gradually mix it in until the dough is a bit sticky.
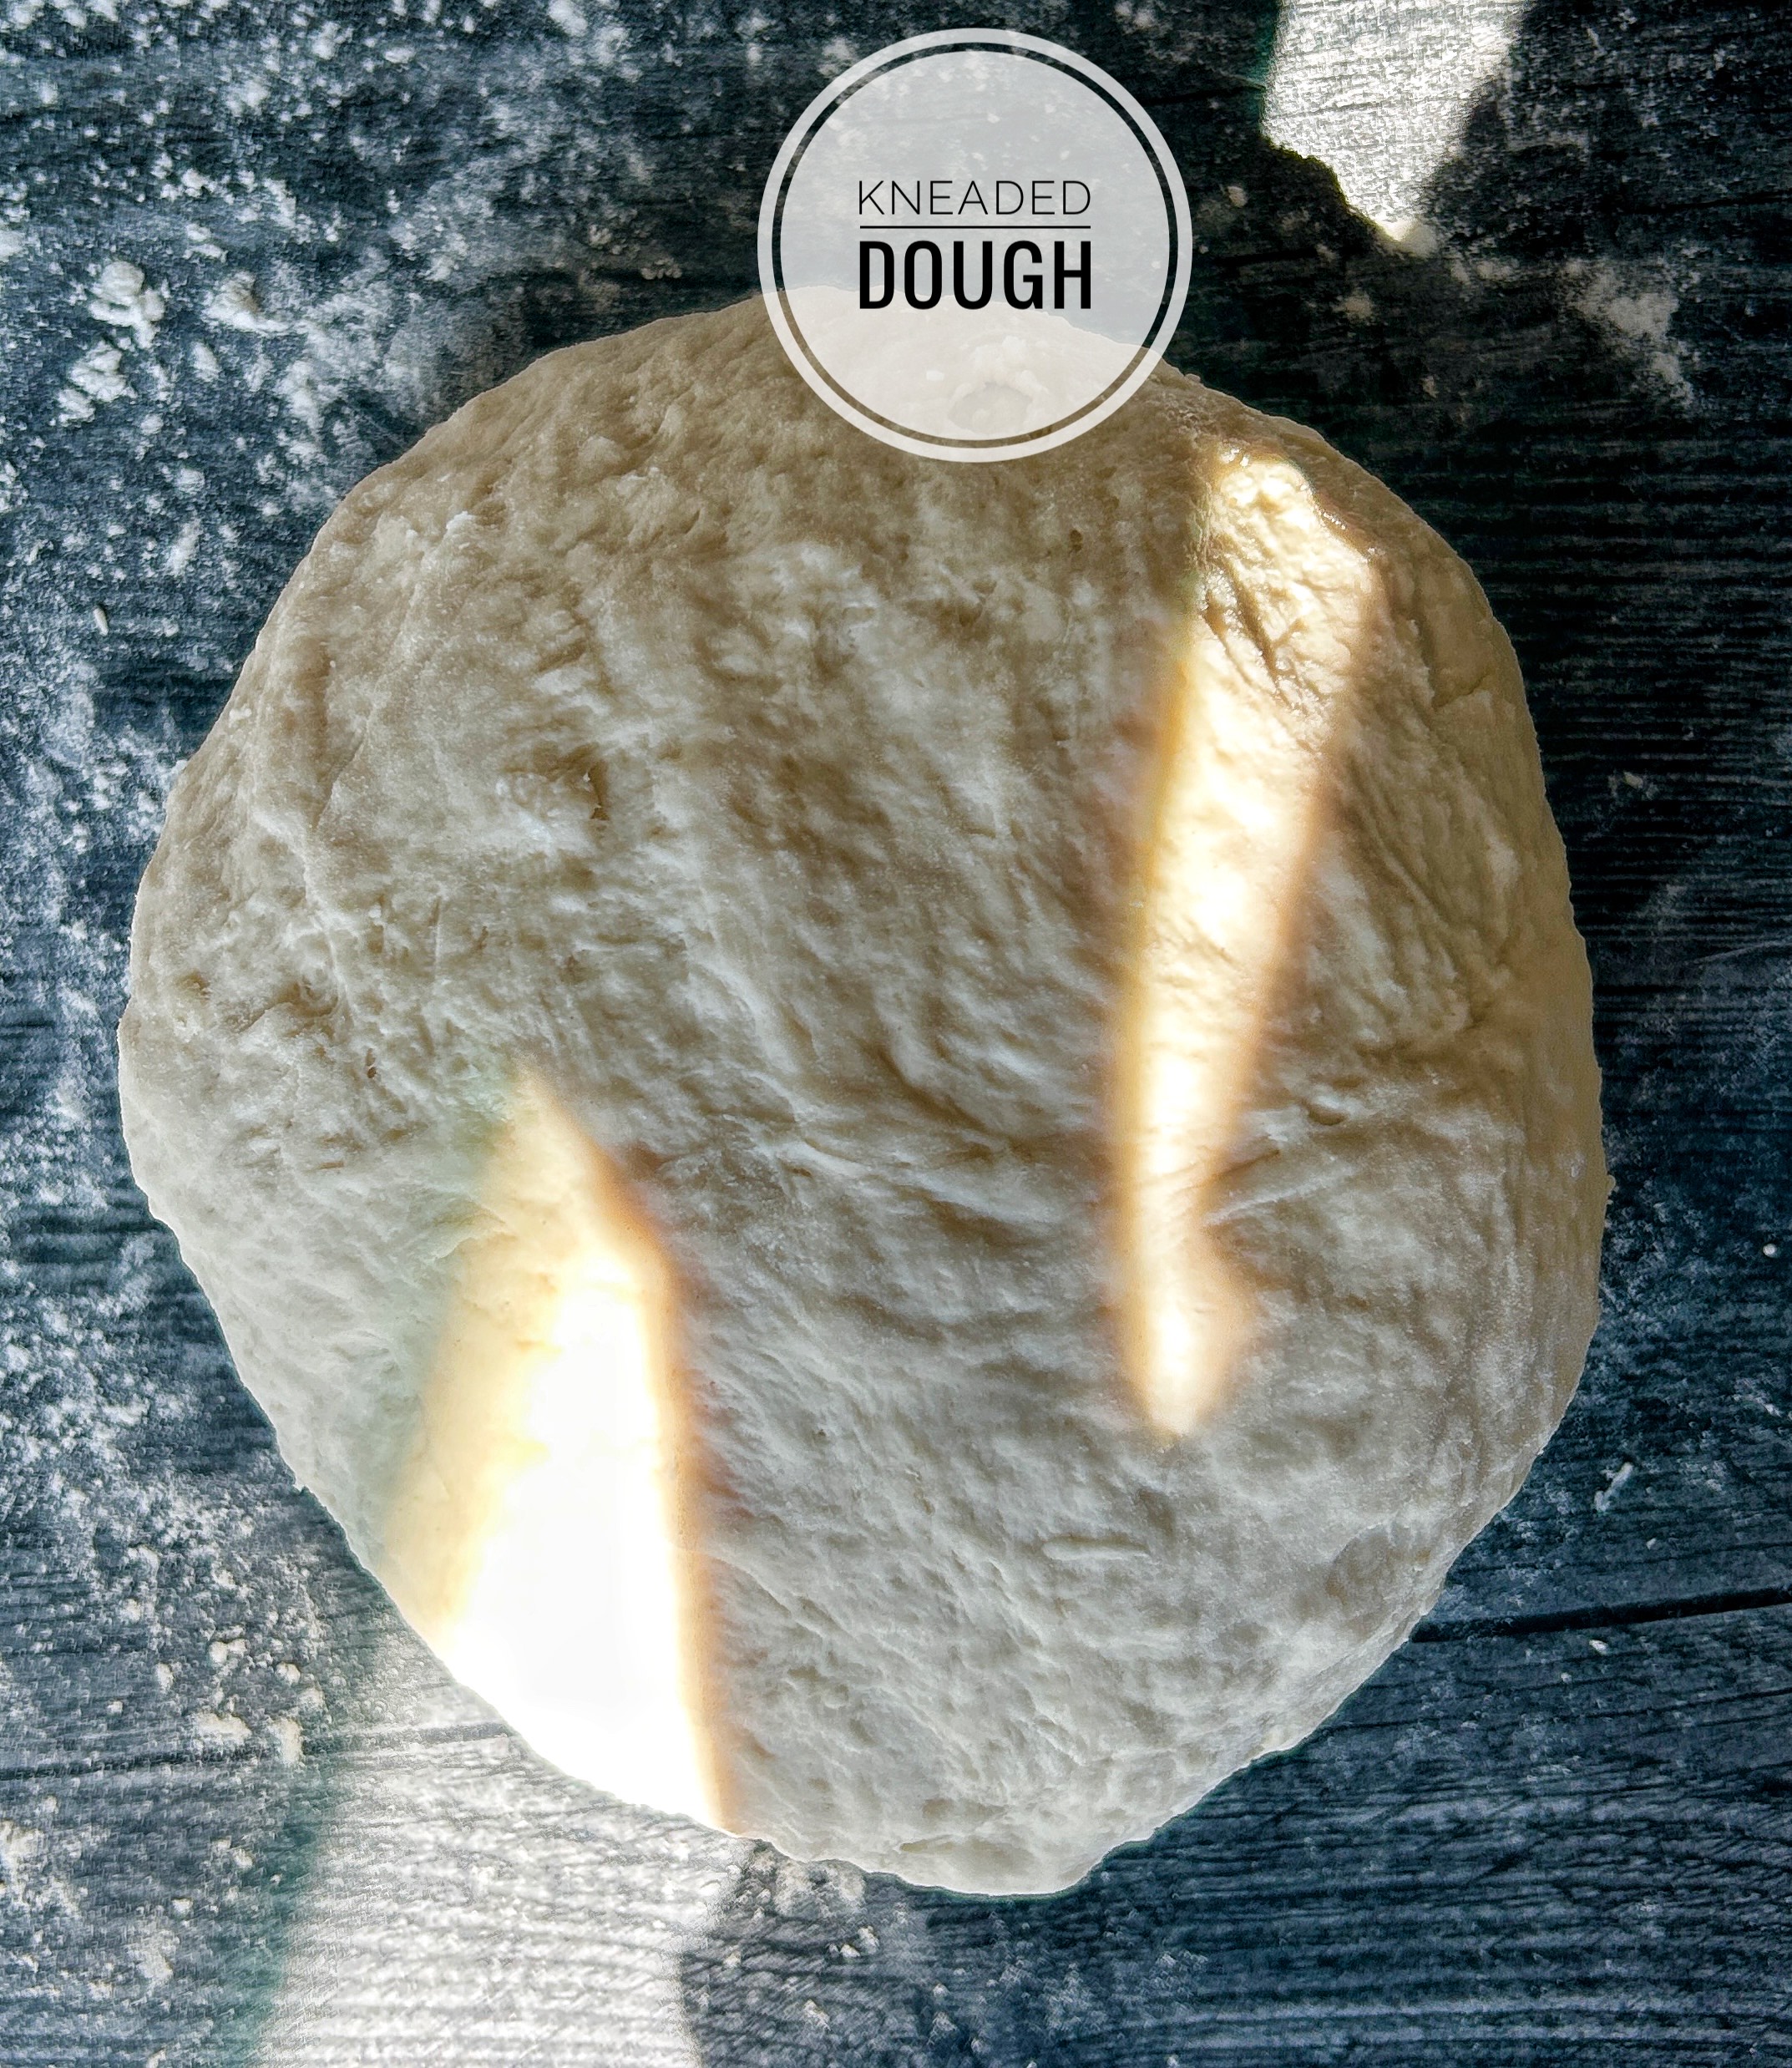
Don’t over-knead: Knead just until the dough is smooth. Overworking it will make it tough.
Let the dough rest: Resting (at least 30-45 minutes after kneading) is essential . It relaxes the gluten for stretchy, rollable dough and yields a tender roti.
Brush edges well: When brushing oil coat every part of the dough including edges with oil. This trapped fat helps create those flaky layers.
Roll it thin: Aim for about 4–5 mm thickness. Thinner dough produces more delicate layers.
Shake and/or Clap after cooking: This separates the layers and keeps the roti soft. Do it while the roti is still hot.
Keep them covered: Stack or wrap cooked roti in a towel or container to trap steam. This prevents drying out and makes them extra soft.
Substitution Tip: Oil vs Butter
Traditional Guyanese roti calls for vegetable oil (and sometimes ghee or butter) in the layers. Using a mix of oil and butter adds richness but you can adjust:
Oil-only: Omit the butter/ shortening and use all vegetable oil. The roti will still be soft and flaky, and dairy-free.
Oil + Butter/Ghee : Instead of shortening, you can use melted unsalted butter/Ghee combined with oil to mix and layer the roti dough.
Serving & Pairing Suggestions for Guyanese Roti
Soft, flaky Guyanese oil roti is incredibly versatile and can be paired with just about any savory dish. Traditionally enjoyed throughout the Caribbean, roti is the ultimate side for scooping, dipping, and soaking up rich, flavorful sauces. Here are some delicious ways to serve your homemade roti:
Guyanese Chicken Curry – A classic combo! The roti soaks up the spiced gravy beautifully.
Beef or Lamb Stew – Tear the roti and dip it into hearty stews for a filling comfort meal.
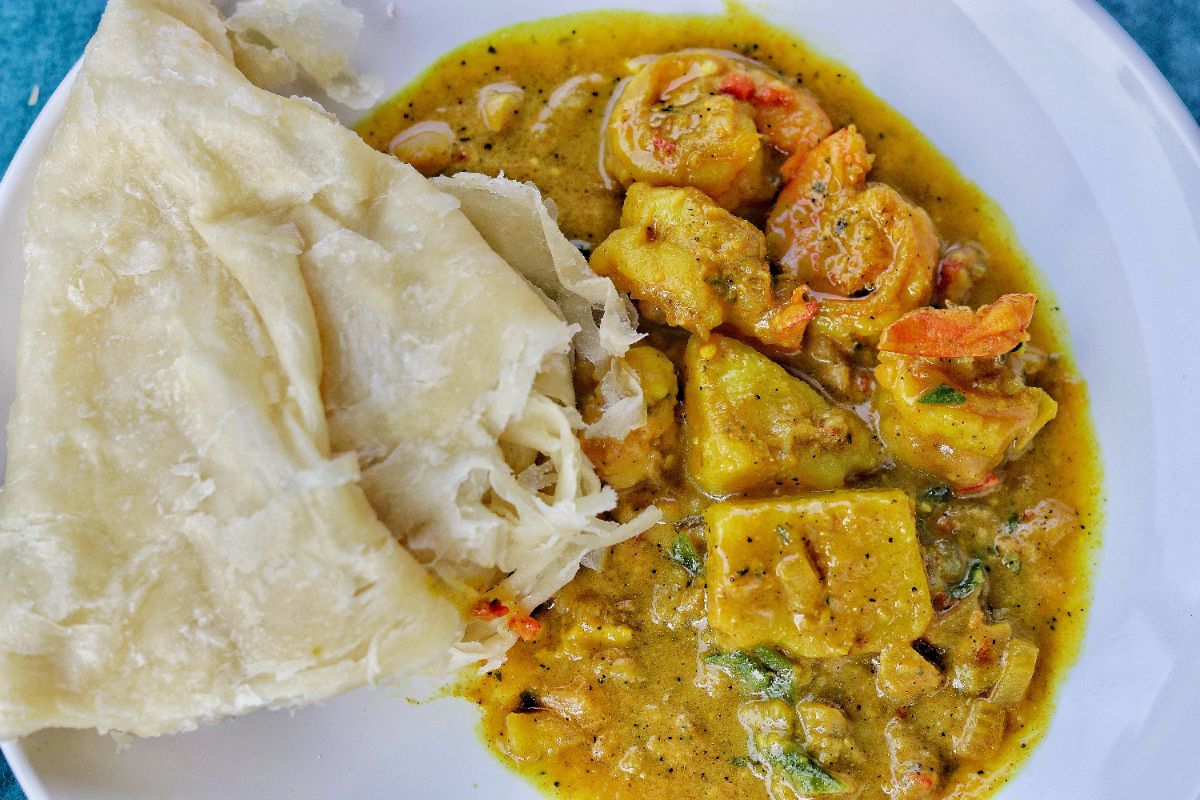
Pumpkin & Shrimp Curry – Another Guyanese favorite, great for brunch or dinner.
Corned Beef Stew – A nostalgic, budget-friendly pairing that hits every time.
Channa (Chickpea) Curry – A vegetarian option that’s rich in flavor and protein.
Eggplant Choka or Baigan Bharta – For a smoky, earthy side that complements the softness of the roti.
Tawa Alternatives for Cooking Roti
Cast Iron griddle – The best substitute! It retains heat evenly and gives that authentic soft yet slightly charred finish.
Nontick Frying Pan – A convenient option that prevents sticking and requires no extra oil for the surface.
Crepe Pan – Its flat, wide surface mimics a tawa perfectly, making it easy to flip roti.
Comal – A flat or slightly concave pan used in Latin cooking; it works wonderfully for roti too.
Storage and Reheating
Fridge: Wrap each roti individually in parchment or foil, then place them in a Ziplock bag. They’ll stay fresh in the refrigerator for up to 5 days.
Freezer: For long-term storage, freeze rotis for up to 3 months. Stack them with parchment or wax paper between each one in a freezer-safe bag to prevent sticking. Let them thaw at room temperature for about 20 minutes before reheating.
Reheat: To keep them soft, wrap roti in a slightly damp paper towel and microwave for about 10 seconds to steam and warm them through.
By the way, leftover roti freeze and reheat beautifully :)
Prefer to watch instead of reading this delicious recipe? check out this video for a quick and easy guide:


Want to save this recipe?
Just enter your email and get it sent to your inbox! Plus you’ll get new recipes from us every week
.jpg?alt=media&token=a6c567f2-7d6e-47bd-a2d7-c2198f798b9d)
How to Make Soft Guyanese Roti (Oil Roti Paratha) – Easy Step-by-Step Guide
Prep time: 25–30 minutes
Cook time: 20–25 minutes
Total time: 45–55 minutes
Yield : 10-12
Description
This easy Guyanese oil roti recipe makes soft, flaky roti just like we grew up eating—perfect for soaking up curry or stews. A true Caribbean staple passed down from my mom, now simplified for your home kitchen.
Ingredients
Guyanese oil roti
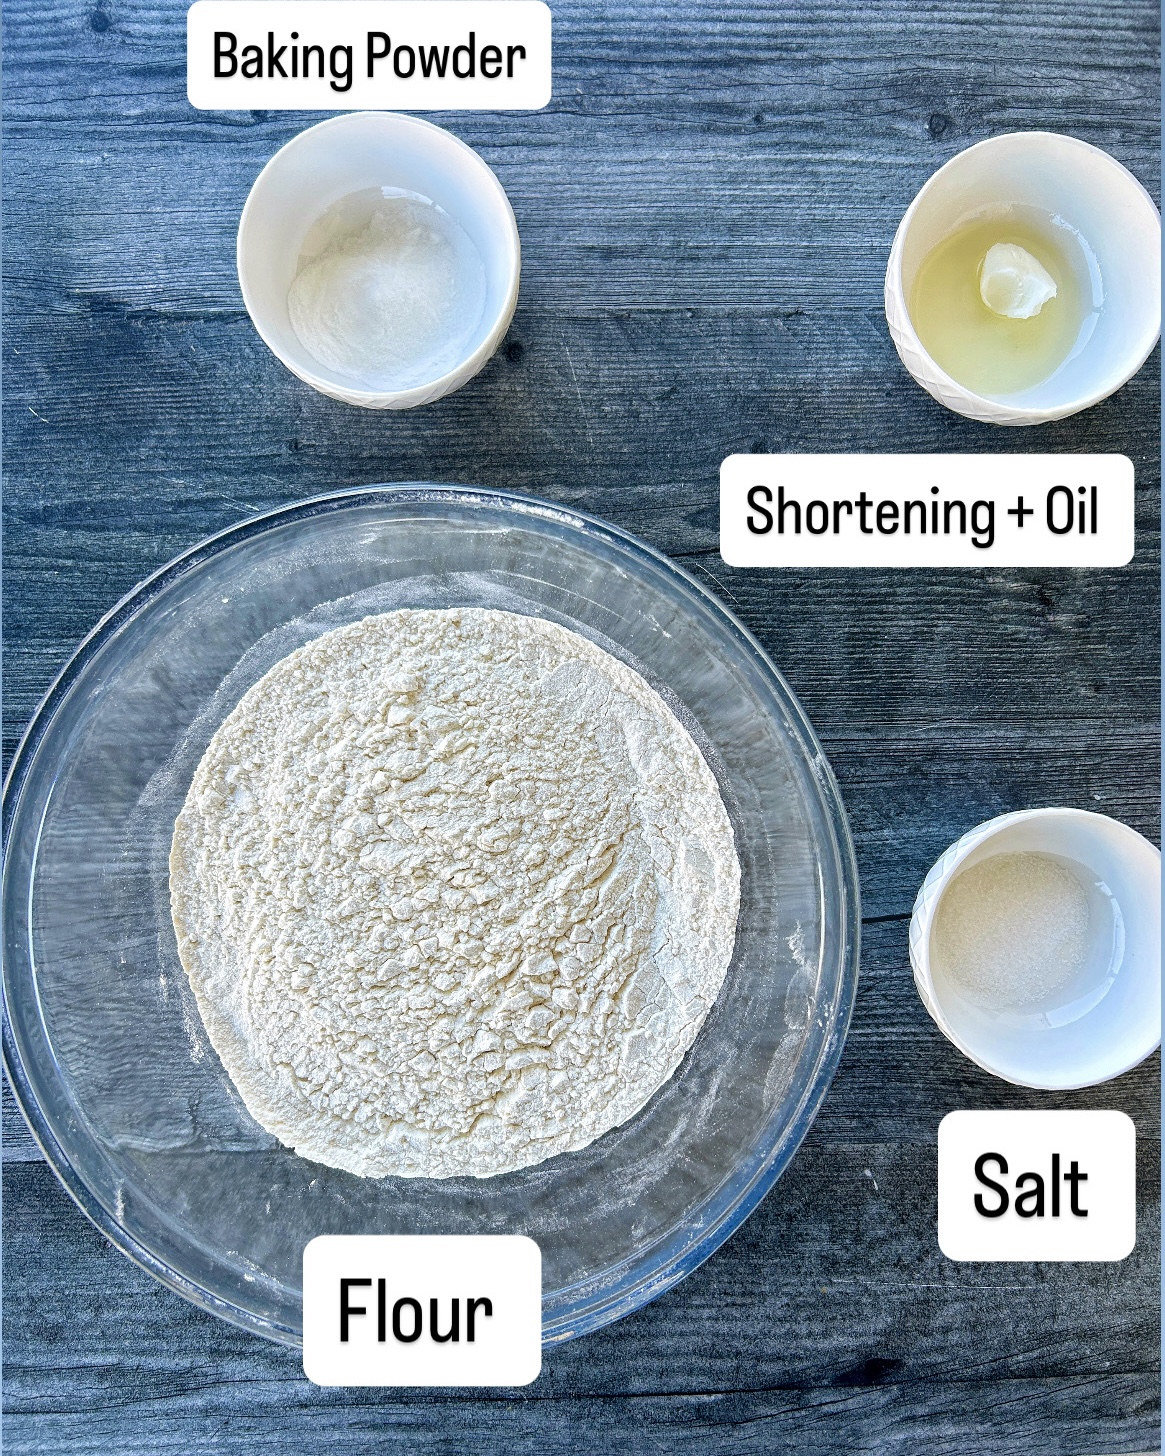
- 4 cups all-purpose flour
- 2 teaspoons baking powder
- 1 teaspoon salt
- 1 teaspoon of shortening
- 1 teaspoon of vegetable oil
- 1½–2 cups lukewarm water, added gradually
- **Additional oil for brushing
- **Additional flour for rolling out dough
Instructions
Step 1: Make the dough
- 1In a large mixing bowl, combine flour, baking powder, and salt. Mix well, then add shortening and oil.
- 2Gradually pour in lukewarm water while mixing until a soft, slightly sticky dough forms. (Tip: Start with 1 cup of water, then add 1/3 cup at a time until the dough comes together; this helps achieve the perfect soft, pliable texture.)
- 3Place the dough on a lightly floured surface and knead gently for about 2 minutes. Add flour sparingly: the dough should remain soft and supple, like play-dough.
Step 2: Divide and Rest
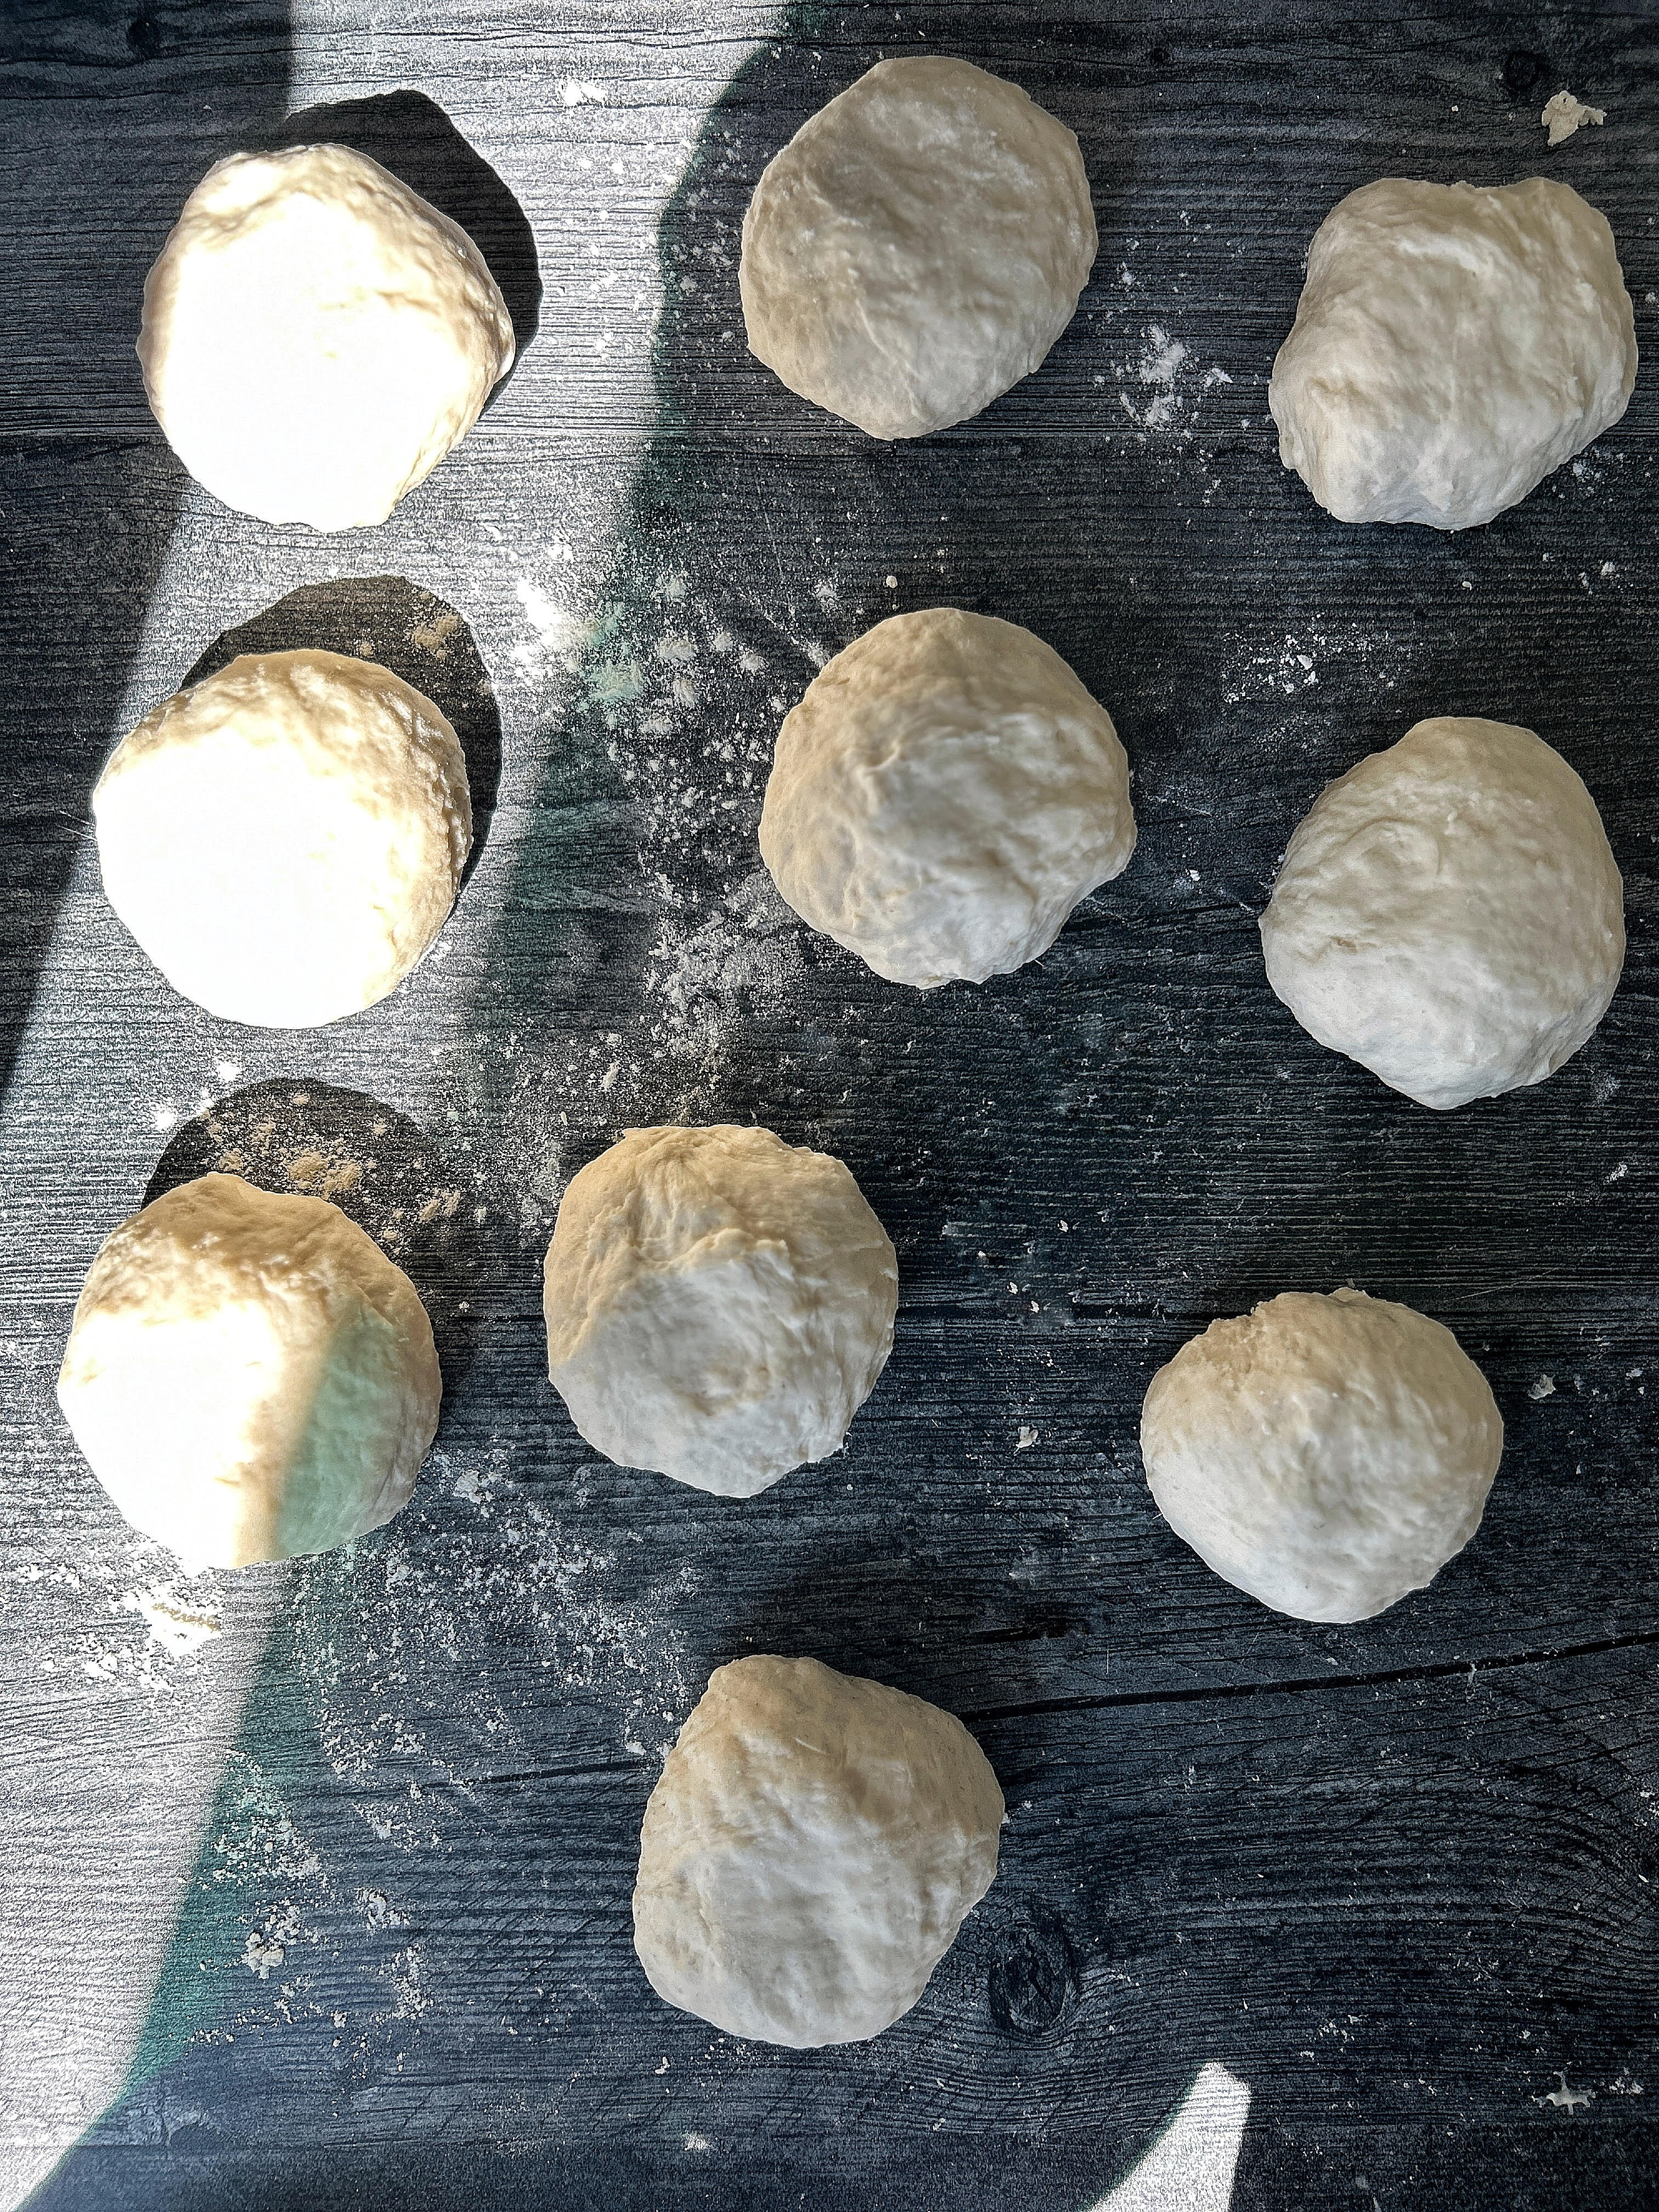
- 1On a lightly floured surface, divide the dough into 10–12 equal pieces then using your hands roll each dough into a ball.
Step 3: Prep your Oil + Flour
- 1Place about ¼ cup of oil in one bowl and ¼ cup of flour in another. You’ll use these in the layering step to create flaky roti.
Step 4: Shape and layer the dough:
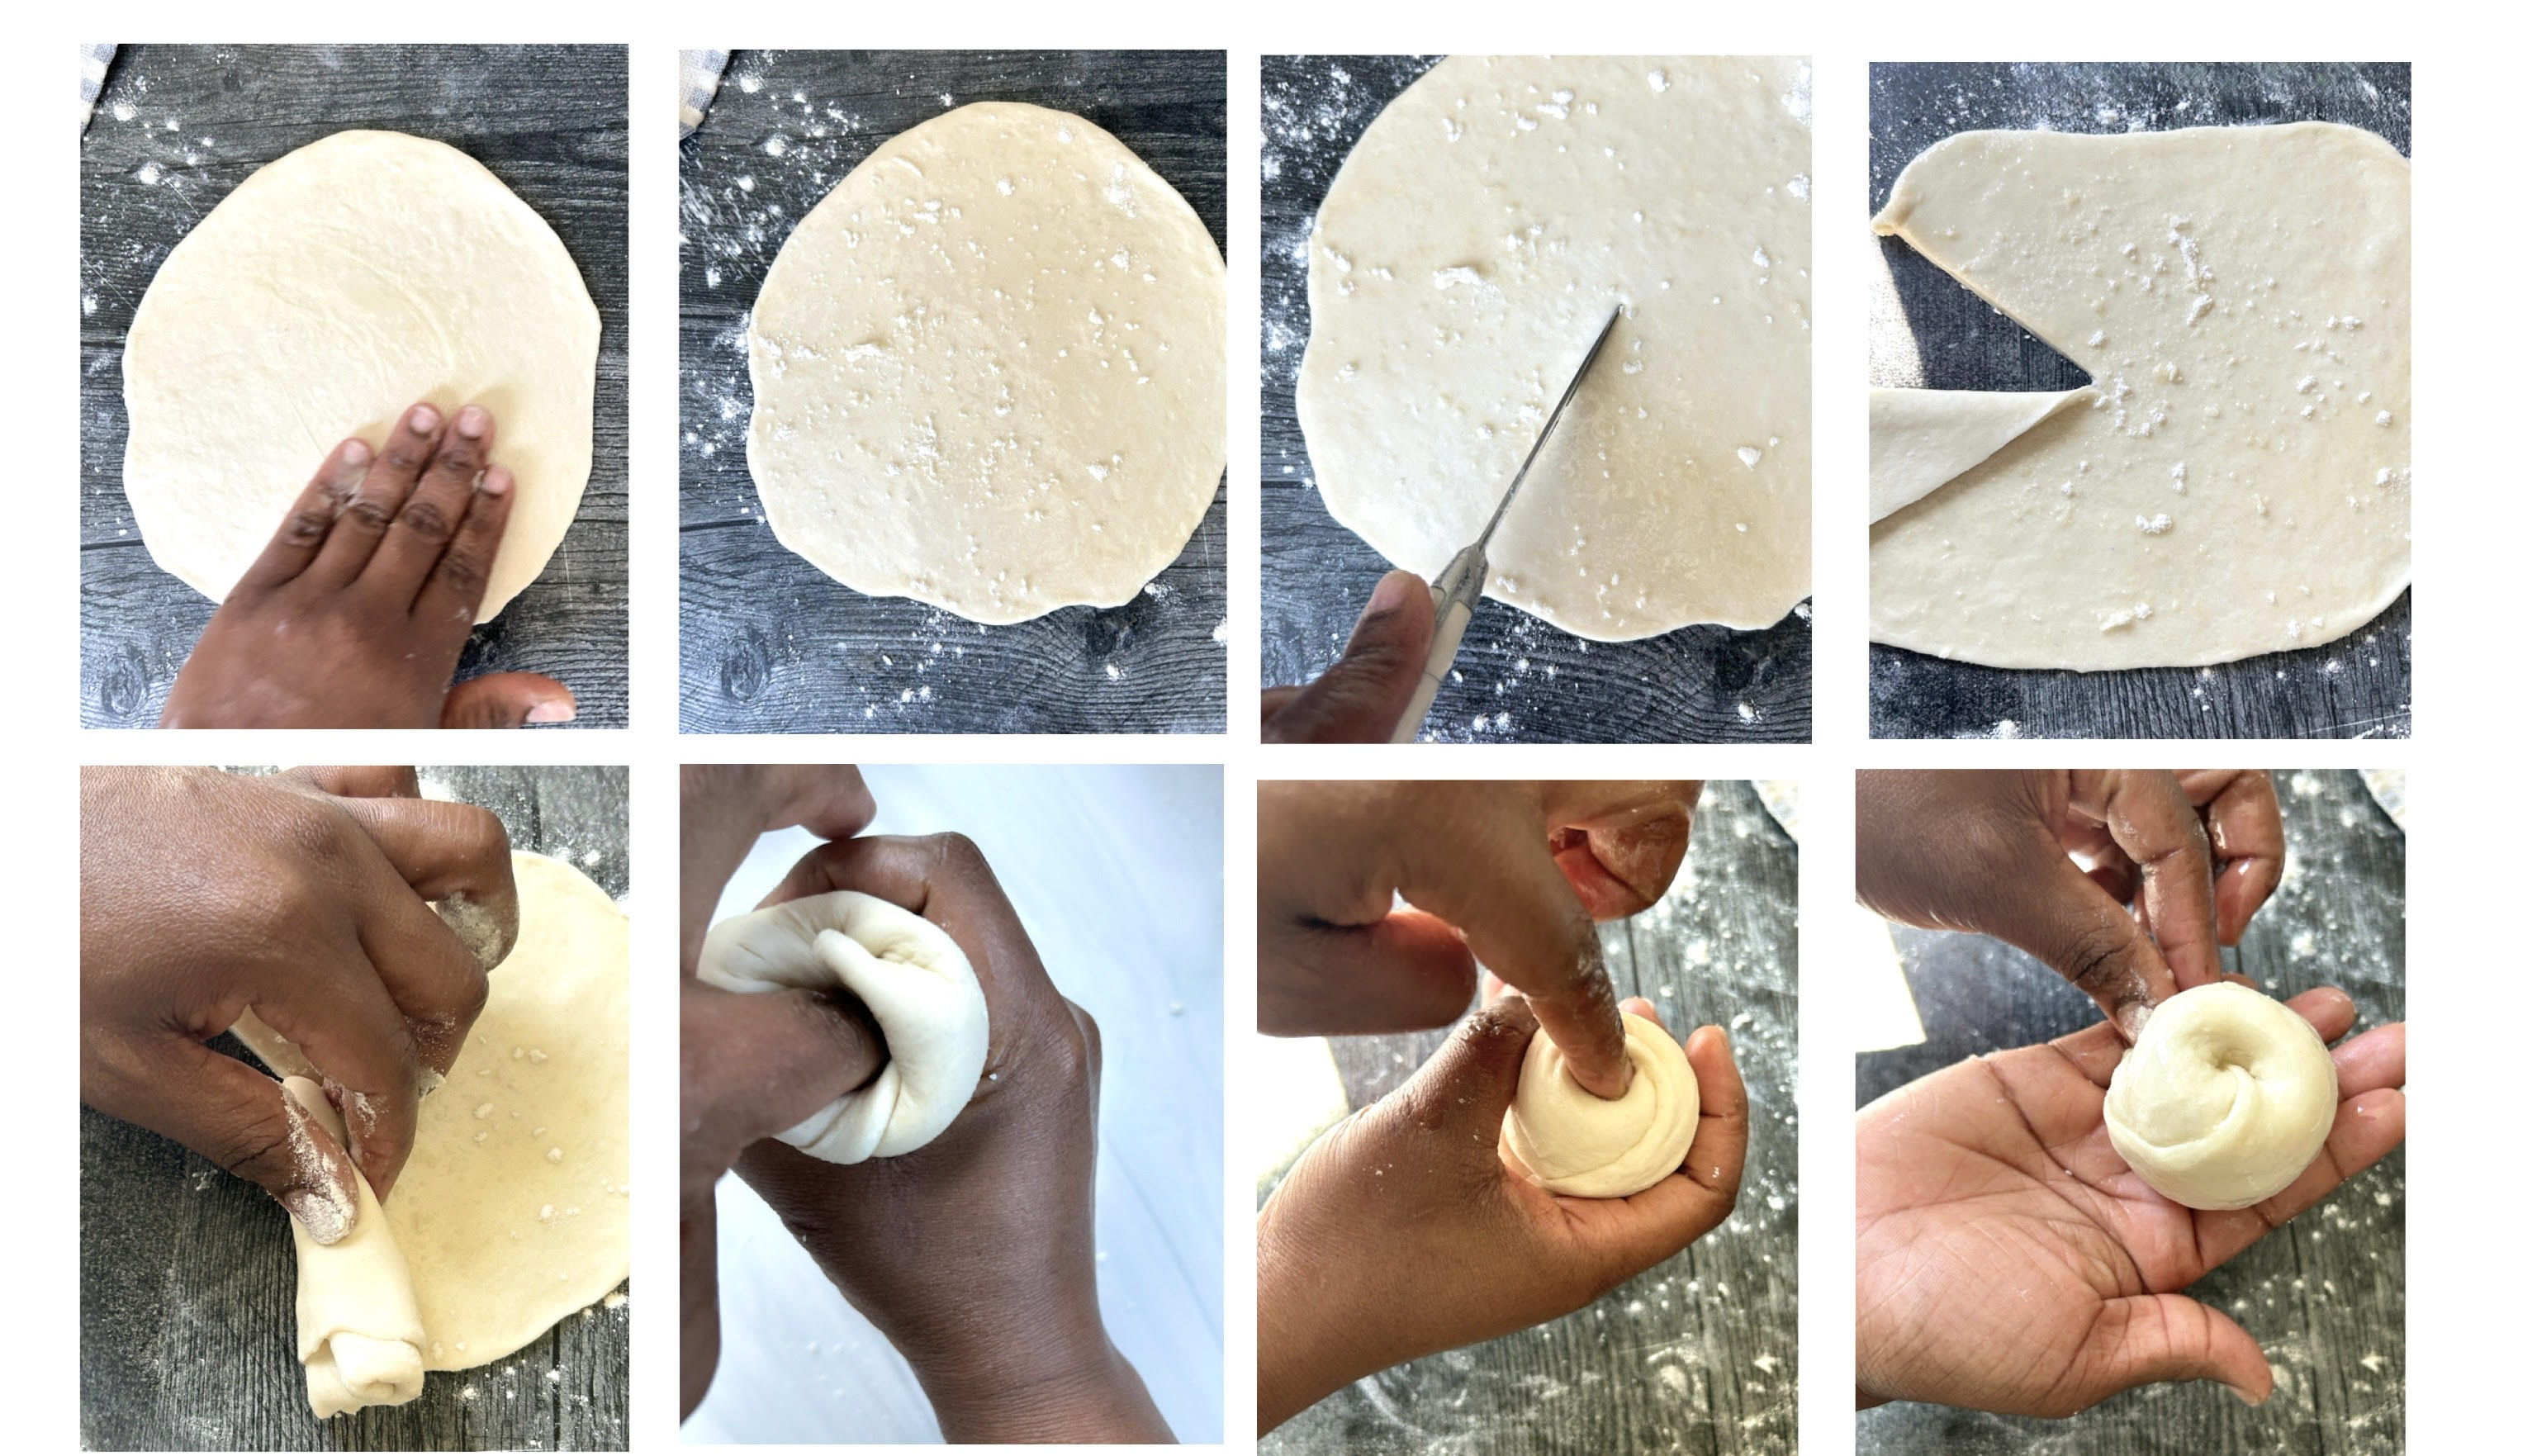
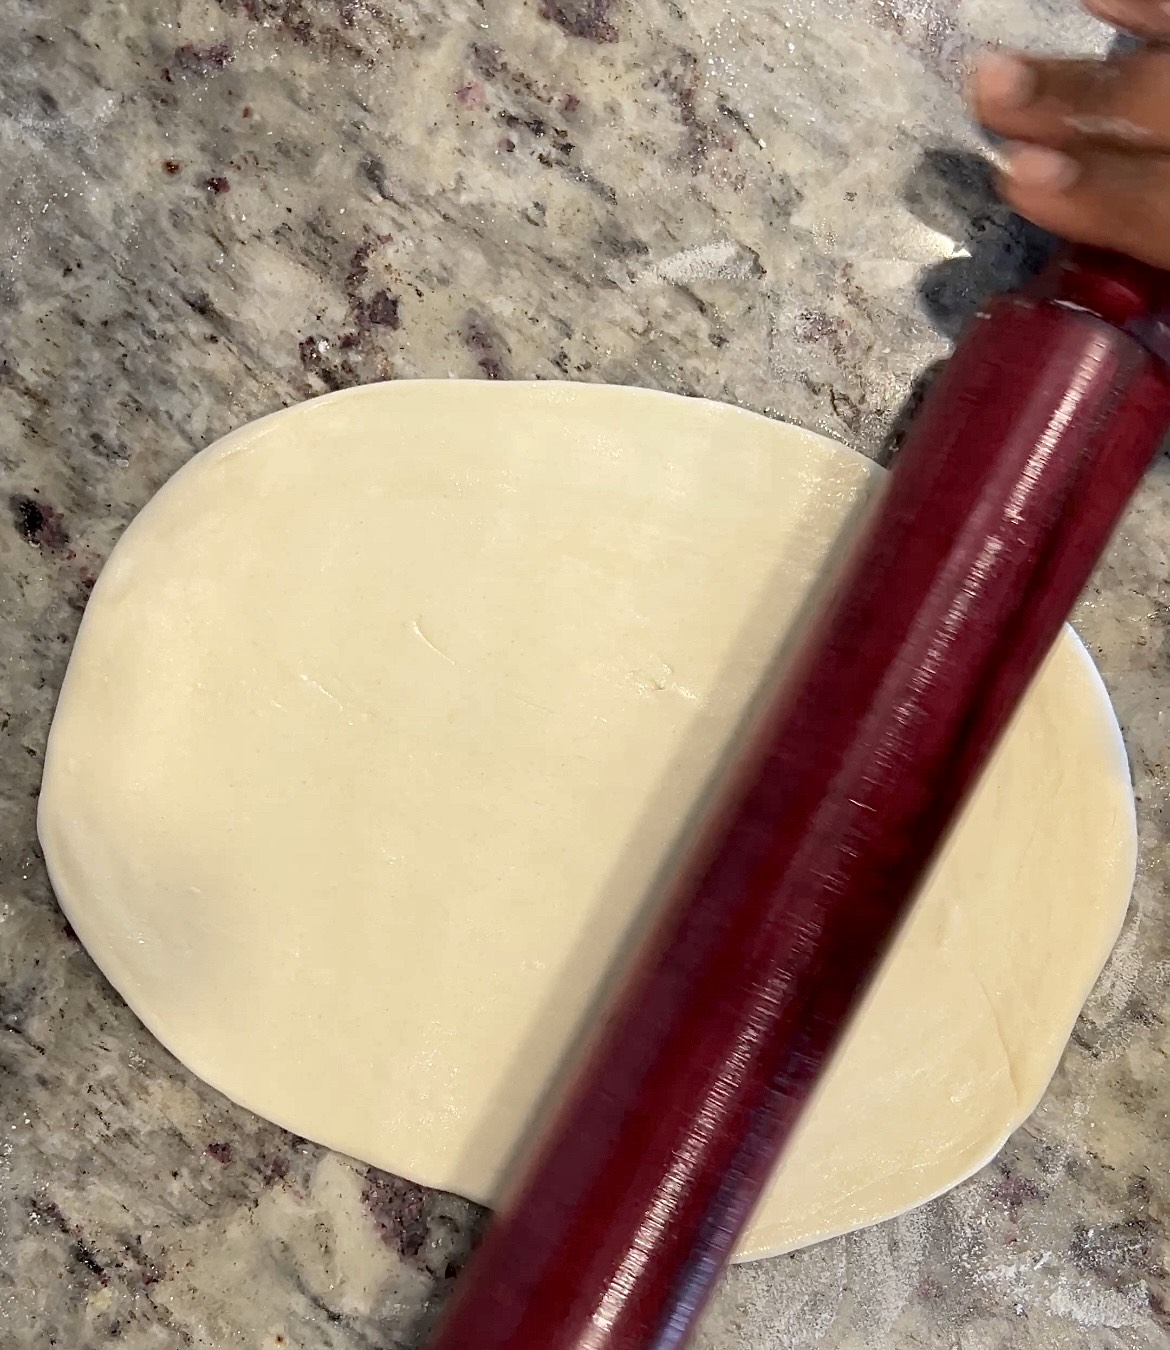
- 1Roll out one dough ball into a thin circle, about 1/8 inch thick.
- 2Brush the surface lightly with oil, including the edges. (I prefer using my hands for this step, but a brush works just as well!)
- 3Sprinkle a little flour evenly on top.
- 4Make a single cut from the center of the circle to the edge (like one slice of pie).
- 5Roll the dough into a cone by lifting one side of the cut and spiraling around into a funnel shape.
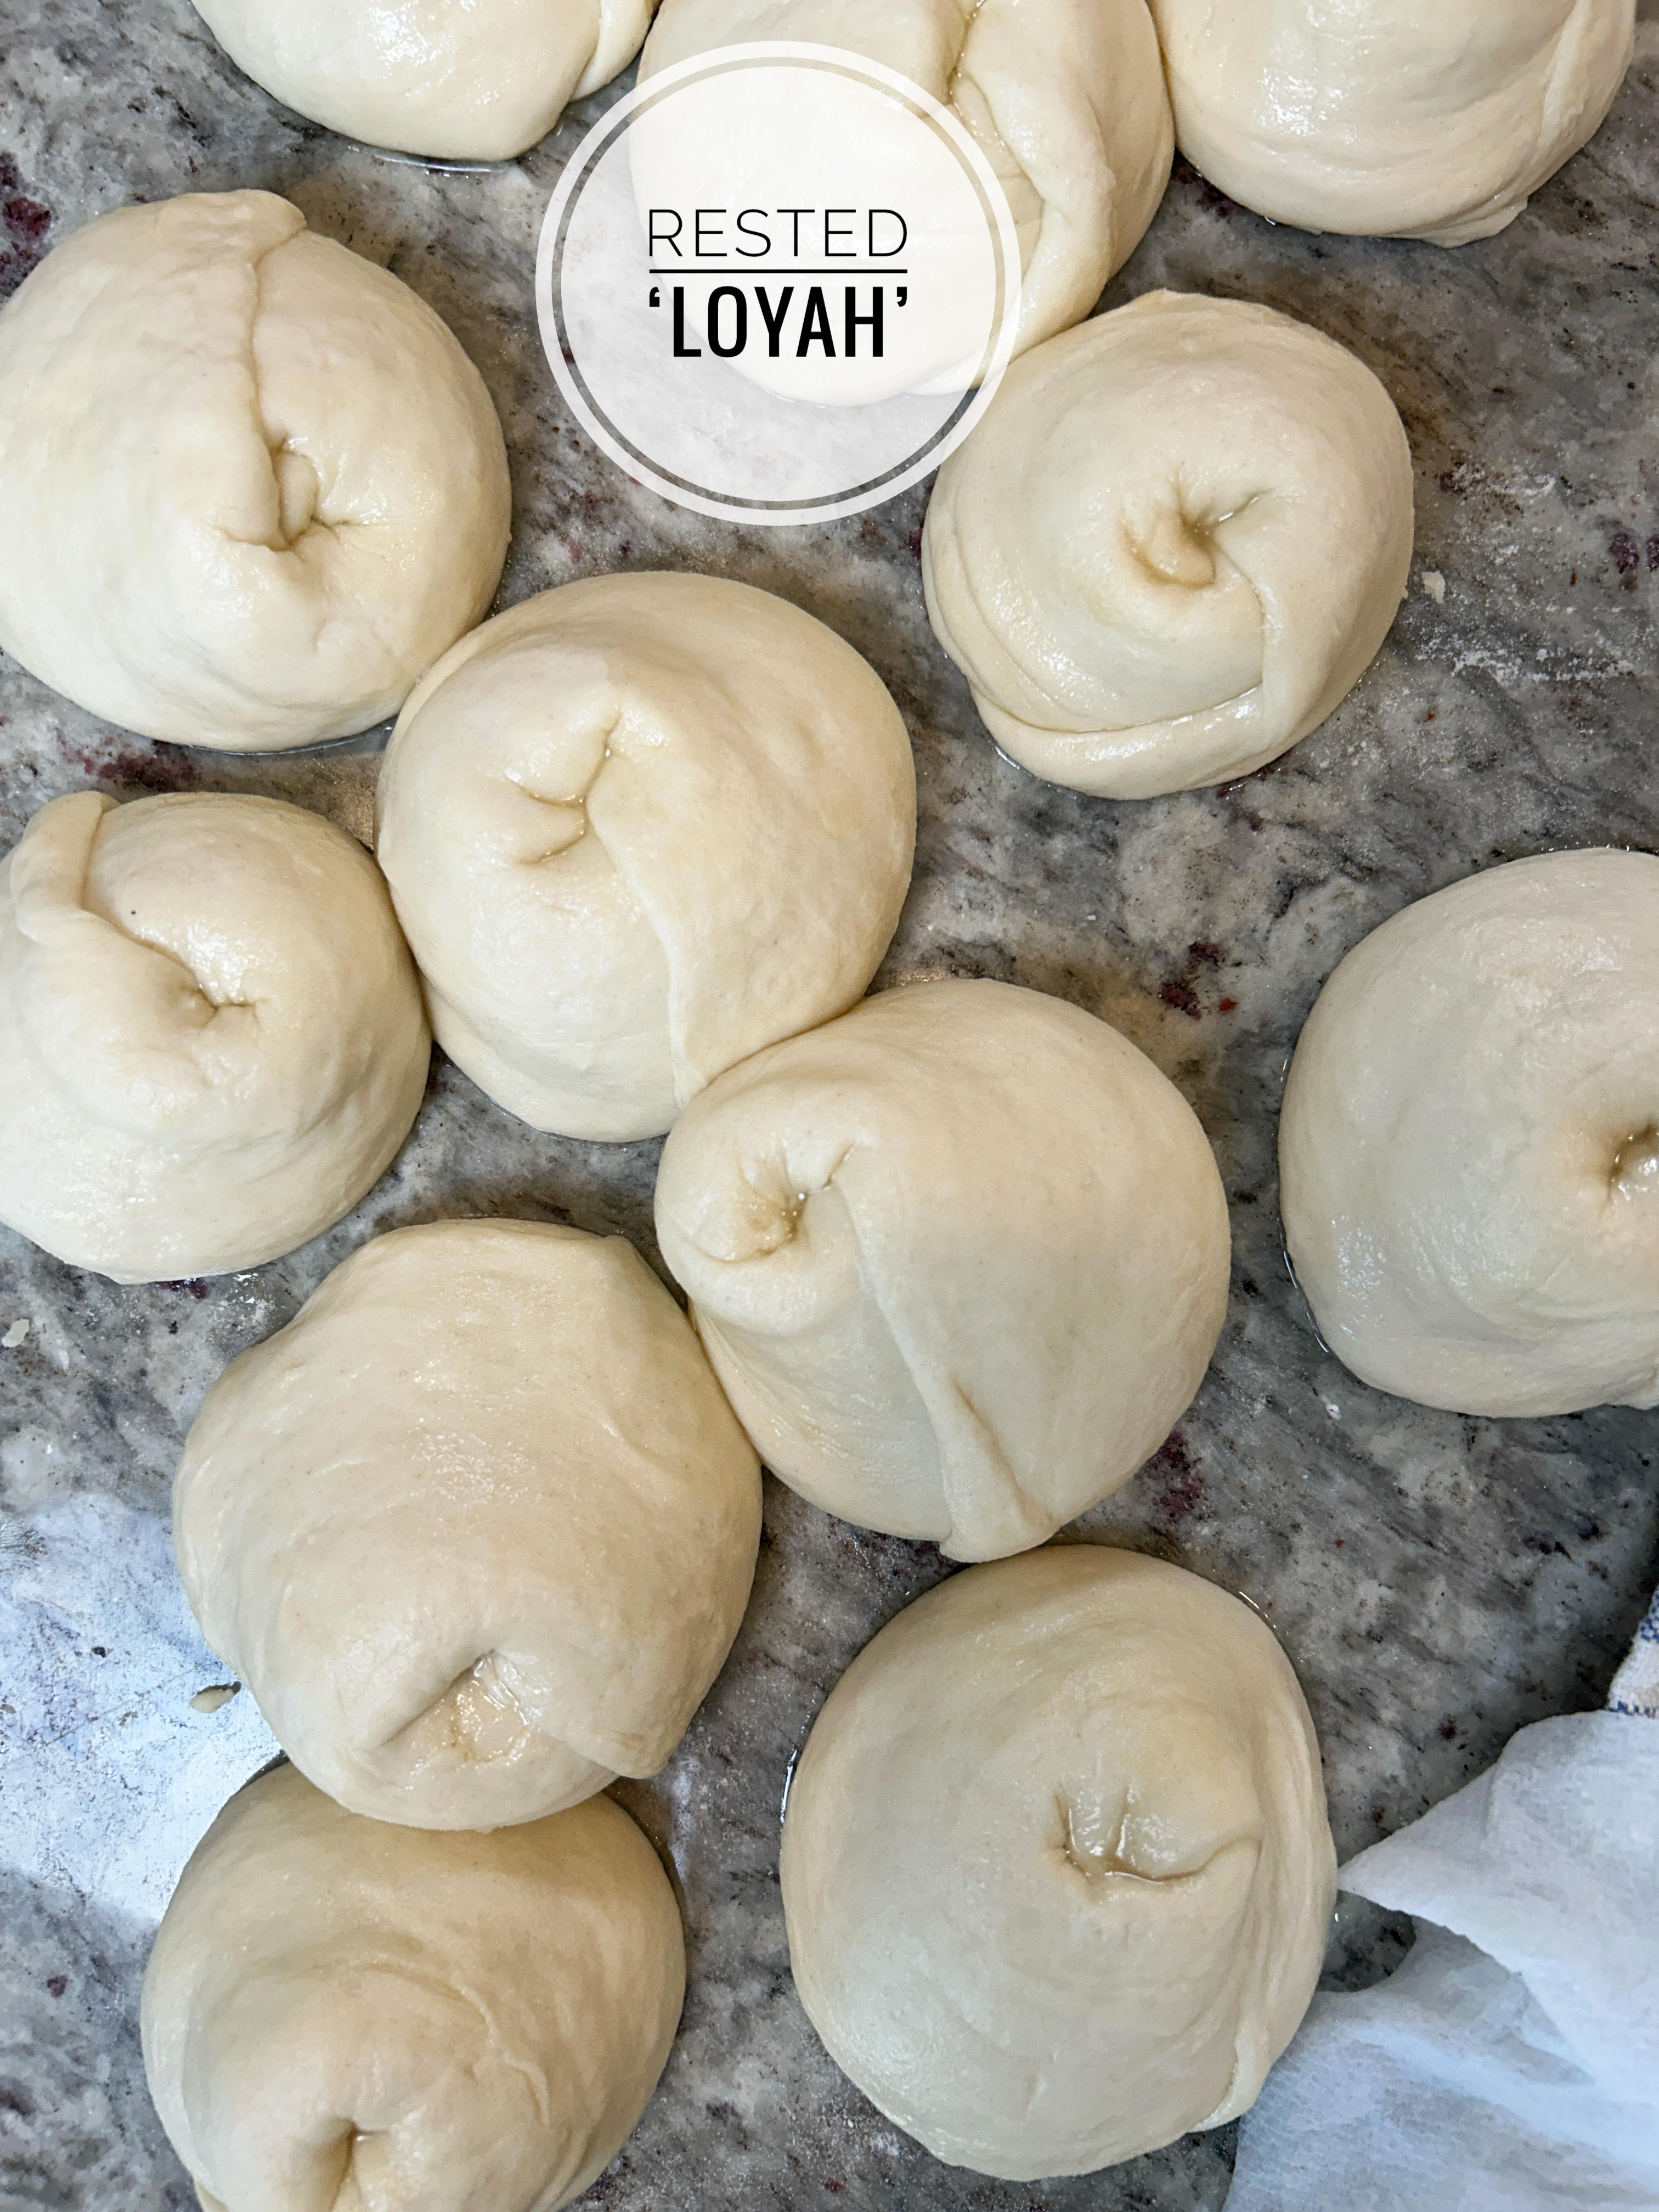
- 6Lightly oil your index finger, then tuck the tip under to seal. Gently press the top of the cone to form a disc then use the leftover oil on your hands to rub over the “loyah” for added moisture. Repeat steps 1–5 with the remaining dough balls.
- 7Once shaped, cover all the roti loyahs with a warm, damp paper towel (moistened with warm water and wrung out well), then place a clean kitchen towel over them to keep the dough soft.
- 8Let rest for at least 45 minutes — this helps create soft, flaky layers.
Step 5: Prepare to Cook the Roti:
- 1Set up your cooking station: have your oil, pastry brush, and a container ready to shake the roti. Keep a clean towel nearby to cover them as you go.
- 2Heat your tawa, cast-iron skillet, or crepe pan over low to medium heat. (Tip: Start on medium to preheat, then lower the temperature once hot. The goal is steady heat — not too high that it burns, and not too low that it undercooks.)
- 3Roll out at least two rested dough discs into thin circles (about 1/8 inch thick) on a lightly floured surface — the cooking process moves fast!
Step 6: Cook as follows:
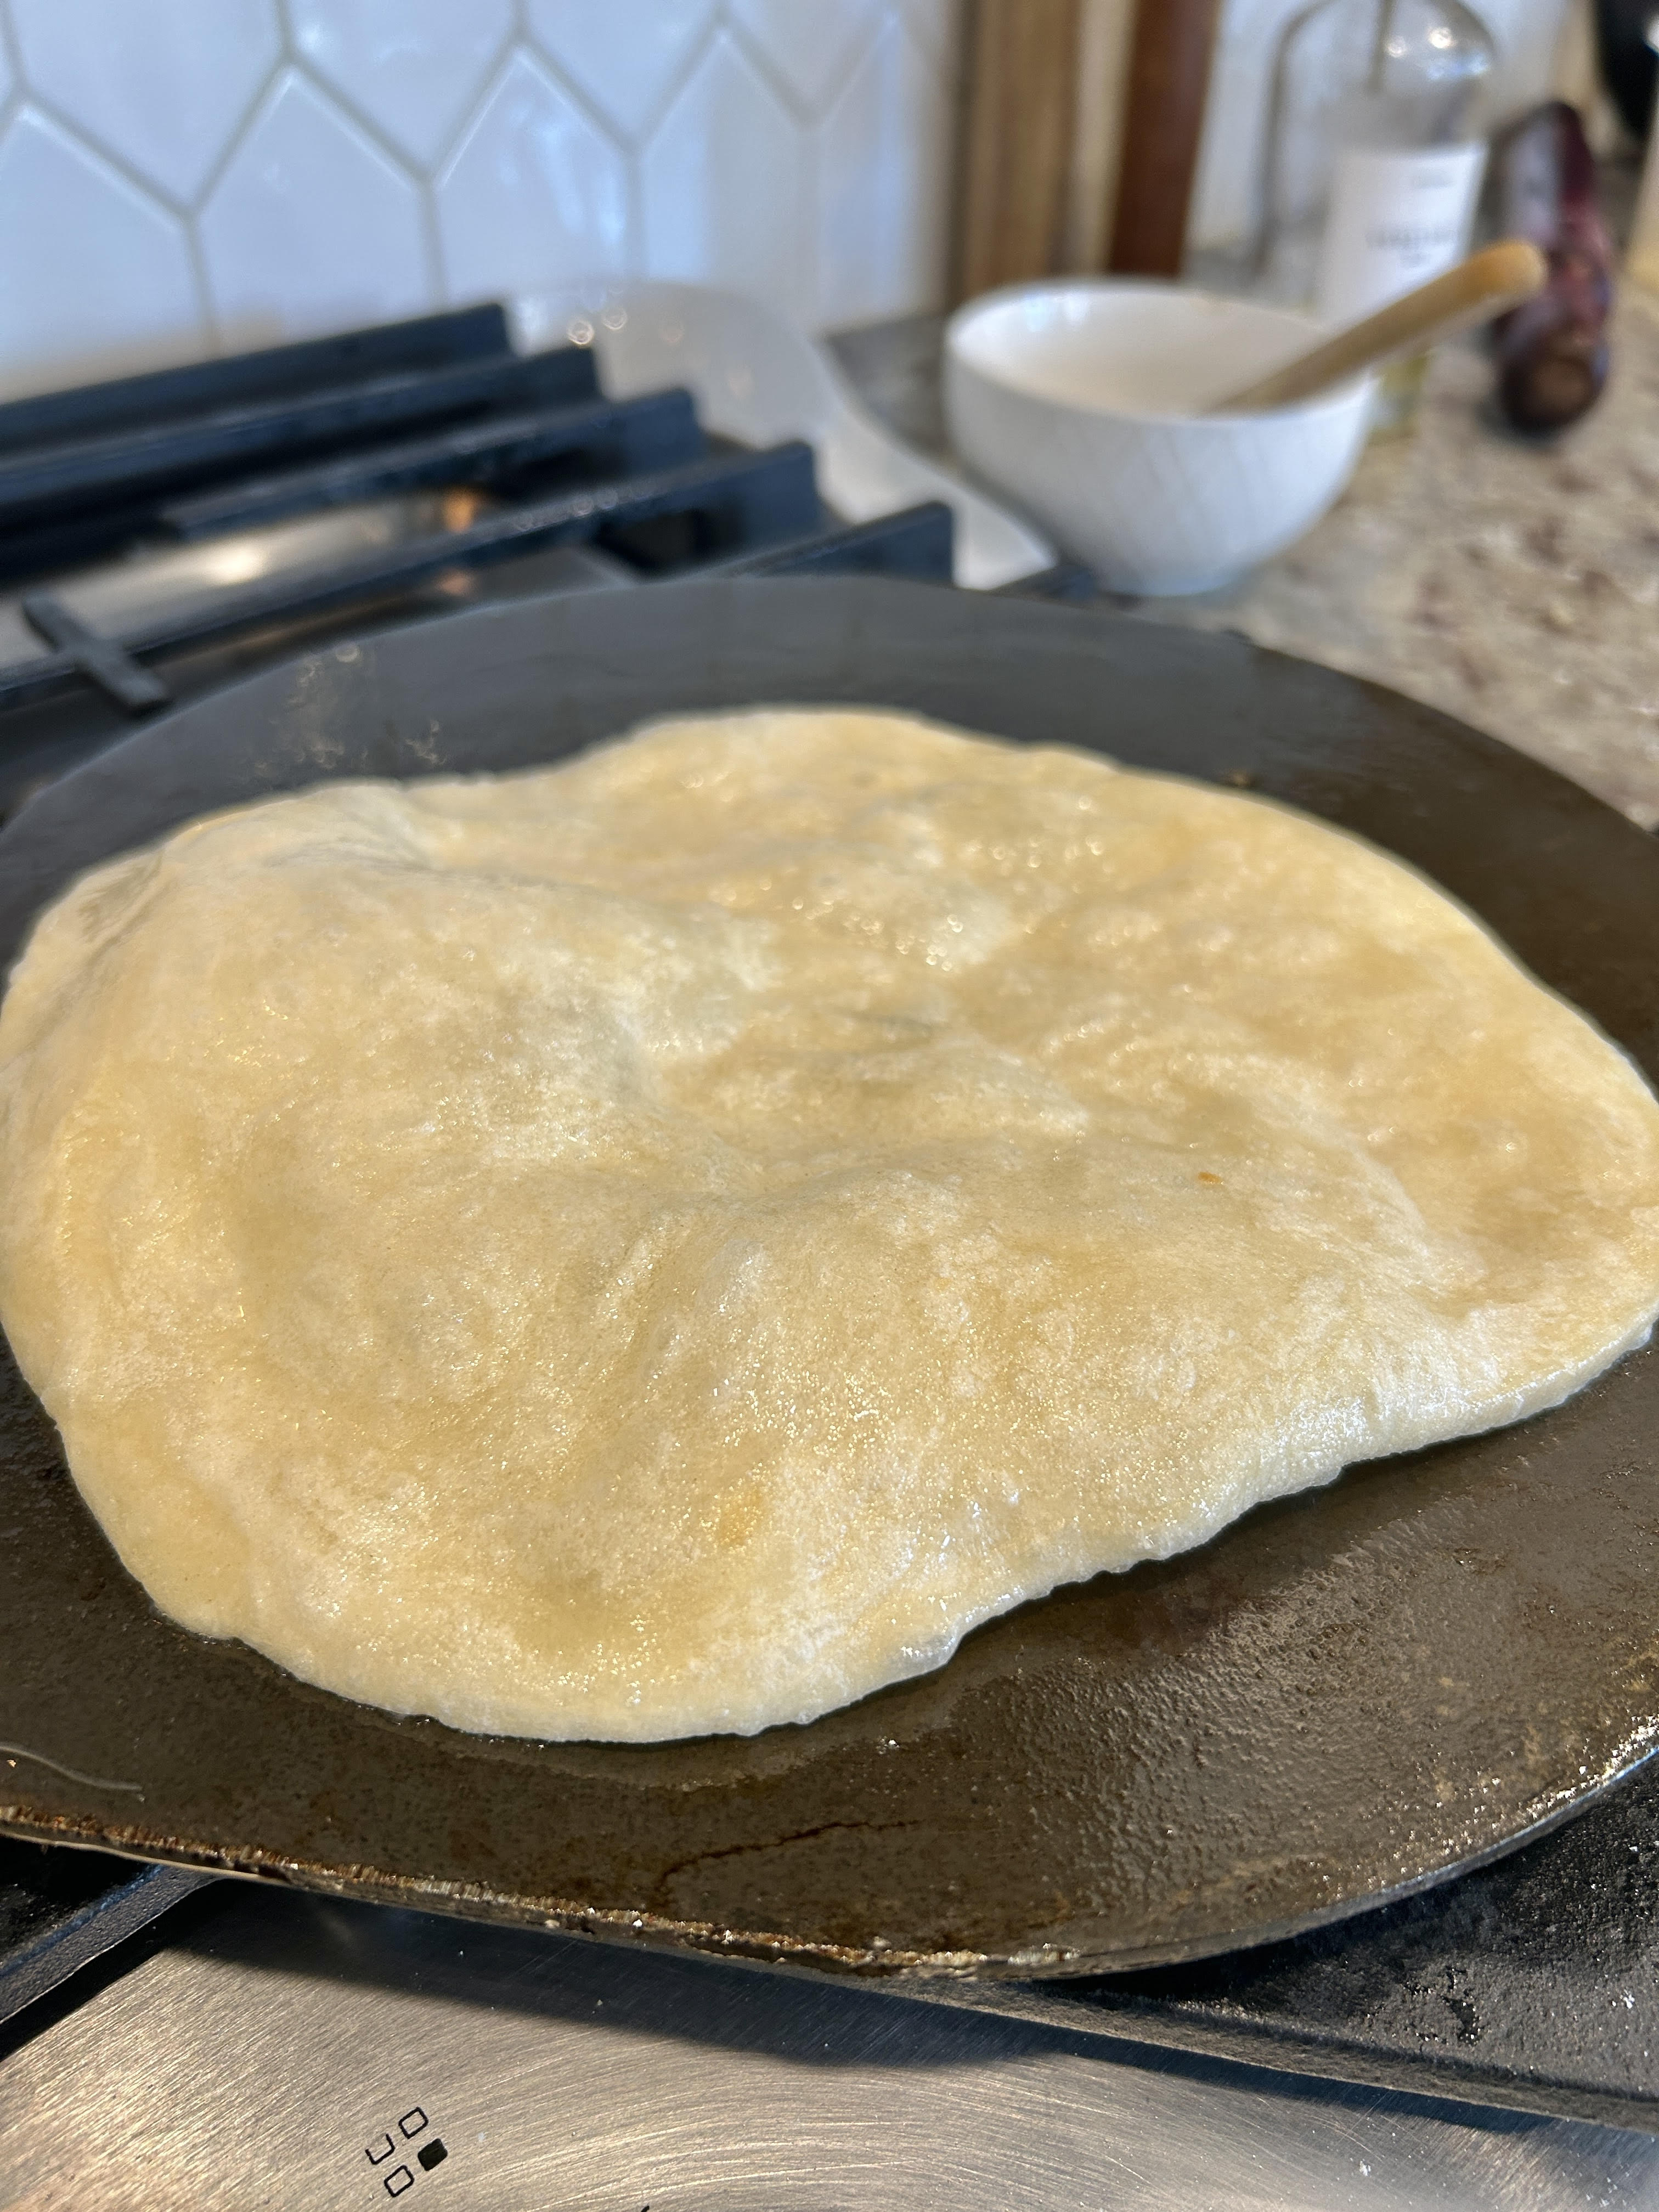
- 1Place one rolled "loyah" onto the hot tawa and immediately brush the top with oil. Flip right away and oil the other side to prevent sticking.
- 2Cook for about 1 minute per side, allowing small bubbles and light brown spots to form. Adjust the heat as needed to avoid burning.
- 3Remove the roti from the tawa once it’s fully cooked and lightly golden on both sides.
Step 7: Fluff and serve:
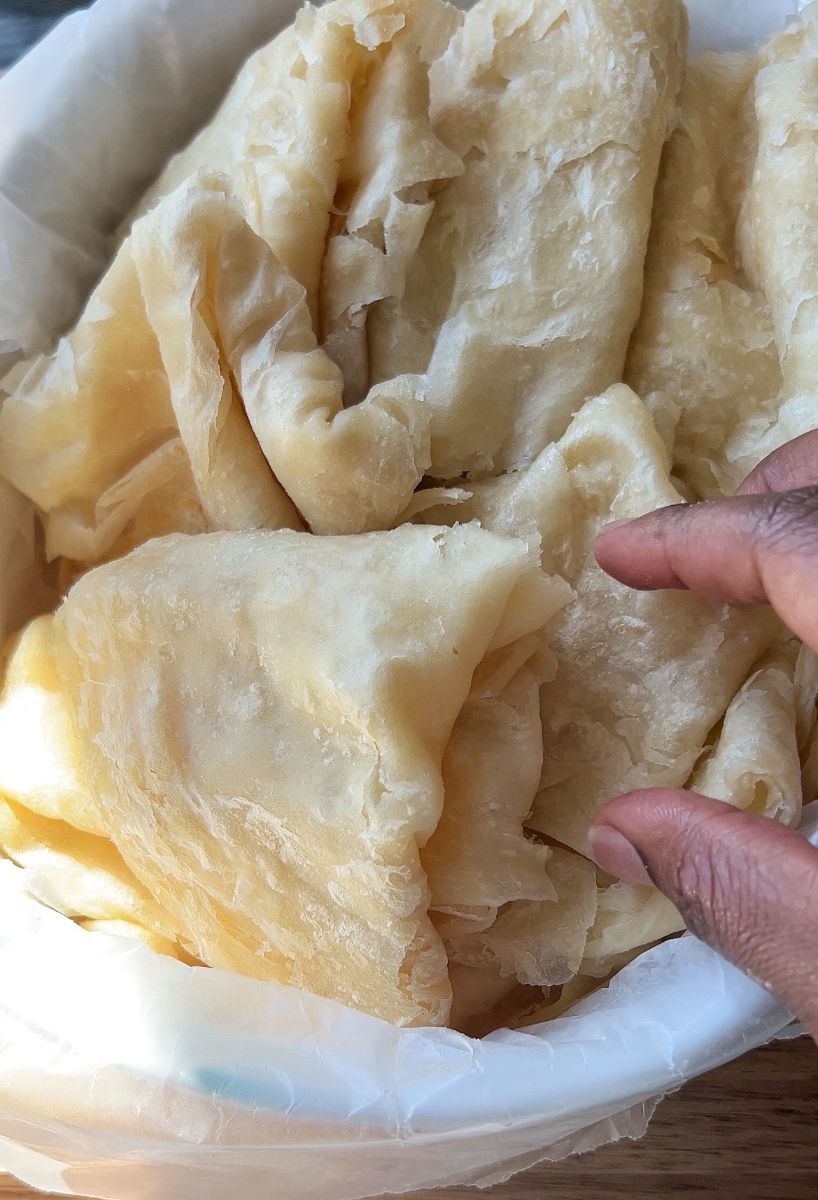
- 1Immediately shake the hot roti in a covered bowl or clap it between your hands to separate the layers and make it soft and flaky. ( My preference is to do both-see video tutorial)
- 2Keep each roti covered with a towel as you cook the rest.
- 3Serve warm alongside curries, stews, or saucy vegetable dishes such as pumpkin stew.
Category: Side Dish
Keywords:
Guyanese roti, Guyanese oil roti, Guyanese paratha roti, Guyanese no yeast roti, Guyana roti recip, How to make Guyanese roti, Guyanese roti dough, Guyanese roti curry combo, Guyanese dhal puri roti, Guyanese sada roti, Guyanese aloo roti, Guyanese roti near me (or Guyanese roti restaurant)Did you make this recipe?
Tag @Foodie_not_a_chef on Instagram
Like this recipe? Share it with friends!
You may also enjoy:

Previous Recipe
Next Recipe
Leave a Reply
Your email address will not be published. Required fields are marked *
Rate this recipe
Comments:
